Ad Code
Bitcoin
6/Bitcoin/post-list
Weekly
NFT
6/NFT/post-list
How to Install Mongodb on Apple Macbook M1
Zikrul
9:55 AM
Table of Contents [Show]
Read Also:
Hello, everyone, I'm back with Om Duck, until today, Om Duck, when I install it on Mac M1, I still feel really confused, I even looked for tutorials. I don't know if it's just the ducklings or something else, how come installing it on M1 is a bit complicated, isn't it? ah but maybe it's because it's not normal.
So, this time, Om Bewok wants to share with you how to install mongodb on the Macbook M1, why share this? because maybe there were people like uncle duck too who at that time were confused about how to install mongodb and were confused about how to set the path.
I'm sure what you're confused about is the path, isn't it? Installing it in Brew is easy, right now, in the path section, sometimes it makes me annoying.
Okay, no need to linger any longer, let's start with how to install mongodb on an Apple Macbook M1.
You guys have to open this https://www.mongodb.com/docs/manual/tutorial/install-mongodb-on-os-x/
Open your terminal then type below:
- $ xcode-select --install
What's the function? for the requirements when we use brew, you have to install this first, maybe the law is mandatory x, kwkwk...
Oh yes, in this tutorial, uncle bewok, install mongodb via brew, actually there are many ways, but according to uncle, the easiest way is to use this brew, just copy and paste it in the terminal kwkwk..
DO YOU CONTINUE?
It's time for us to install brew by typing as below.
- $ brew tap mongodb/brew
Next, we type this
- $ brew update
So, because Om Bewok wants the free one, let's just use the community one, right now it's MongoDB that we want to download version 6.0, so maybe every year it will be different, it's up to you whether you want to follow Om Bewok or look for the newest Mongodb.
If you want to see the latest version, you can search on https://www.mongodb.com/docs/manual/tutorial/install-mongodb-on-os-x/.
NOW, WHEN WE INSTALL MONGODB, we type it as below.
- $ brew install mongodb-community@6.0
It's a bit long, so you can watch YouTube first or scroll through Tiktok, too.
When it's finished, let's set the path, but before that we have to know where we put the path, so we type it like below
- $ ls -la
So there must be a lot of them, so let's focus on these 3 files which are the most crucial in the world of perpaths
- . bashrc
- .bash_profile
- .zshrc
We install all three, how do we do it? we use what is called a text editor, you can use vim or nano.
free up to you. Oh, the bewok here uses Vim, right?
We type in the terminal below
- $ vim ./bashrc
- export PATH=$PATH:/usr/local/opt/mongodb-community@6.0/bin
How to right click then paste, to save it type
1. esc
2. :wq
3. enter
In section 6.0, you can change the version that you installed, but if you are the same as Uncle Duck, just paste it, hohoho...
Next in the ./bash_profile section
We type in the terminal below
$ vim ./bash_profile
Then input: export PATH=$PATH:/usr/local/opt/mongodb-community@6.0/bin
How to right click then paste, to save it type
1. esc
2. :wq
3. enter
Next, if you install iTerm2, we have to put the path in ./zshrc
We type in the terminal as below
$ vim ./zshrc
Then input
export PATH=$PATH:/usr/local/opt/mongodb-community@6.0/bin
How to right click then paste, to save it type
1. esc
2. :wq
3. enter
Okay, if you have exited your terminal, then reopened it, then you can open the terminal.
Then you type
$ brew services start mongodb-community@6.0
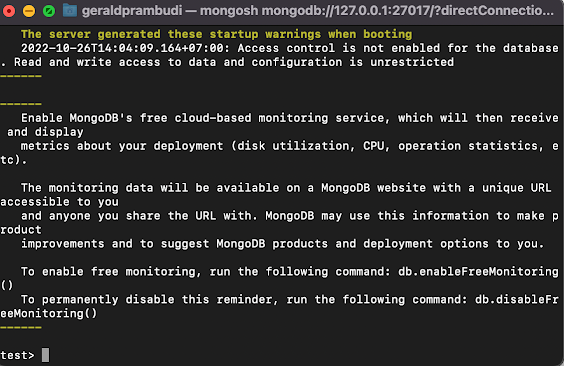
Next we check whether our mongodb is already installed in the path
$mongosh --version
1.6.0
Ratings:
Platform:
Monthly
Ethereum
6/Ethereum/post-list
Warships
6/Warships/post-list
Cryptocurrency
3/Cryptocurrency/post-list
Banking
3/Banking/post-list
Footer Menu Widget
Copyright ©
E-Cryptoku | Digital Media and Cryptocurrencies


0 Comments